Crafting Custom Context Menus

About This Space
An example to show you how to create custom context (right-click) menus and add them to your widgets.
Last updated on July 3, 2019
Forked from: /megan_bond/event-menus/
Public Permissions: View Open/Fork Run Comment
Crafting Custom Context Menus
This is the NodeRun workspace for our Custom Context Menus blog post. Feel free to head on over to check it out!
Why Custom Context Menus?
A context menu is the menu that pops up when you right click an object. Some developers would prefer to hide action options in a context menu rather than clutter the screen with buttons. Doing this can be a bit tricky, though, especially when you want to create a lot of options, some or all of which you would like to be dynamicaly curated based on the context the user right-clicked. The following example is a context menu specific example of our Profound Pro Tip: Creating Custom Tool Tips.
Setting Up Your Screen
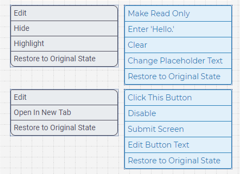
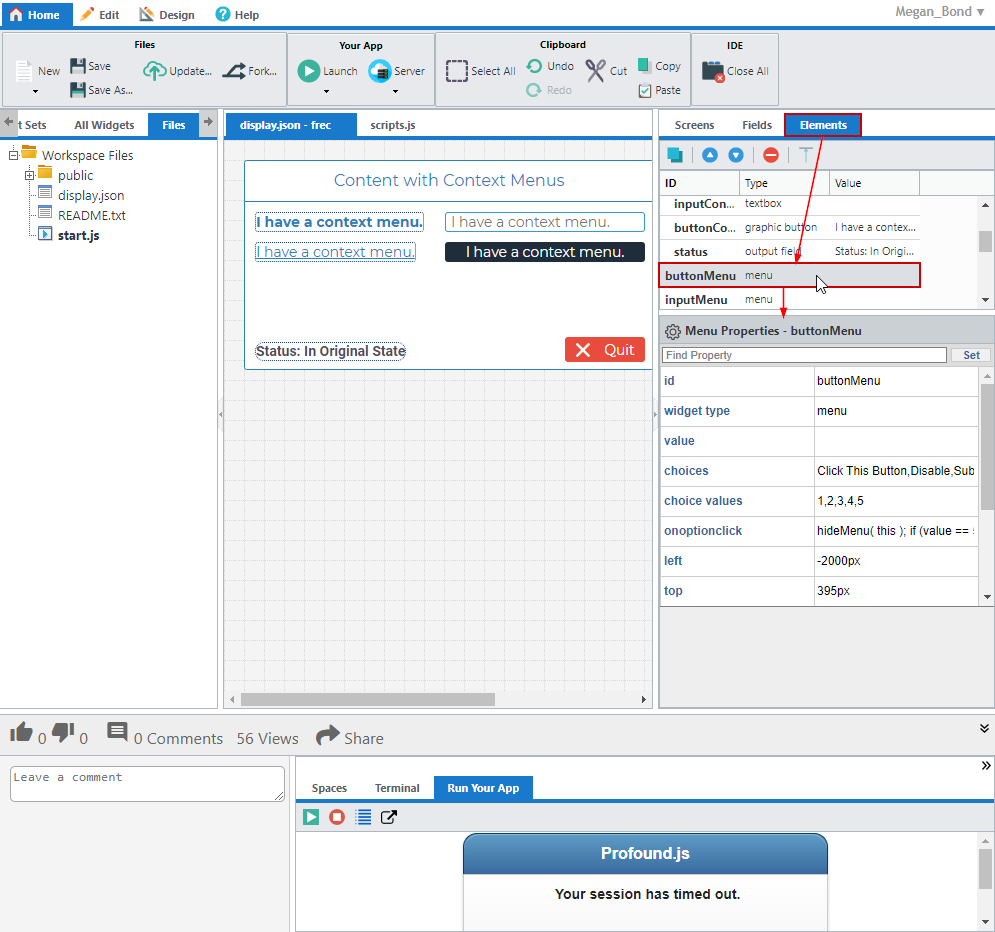
First step is setting up the screen. In the screenshot below, you can see that several menus and elements have been added to the design area. The menus will be our eventual context menus, but you can pretty much have anything be a context menu.
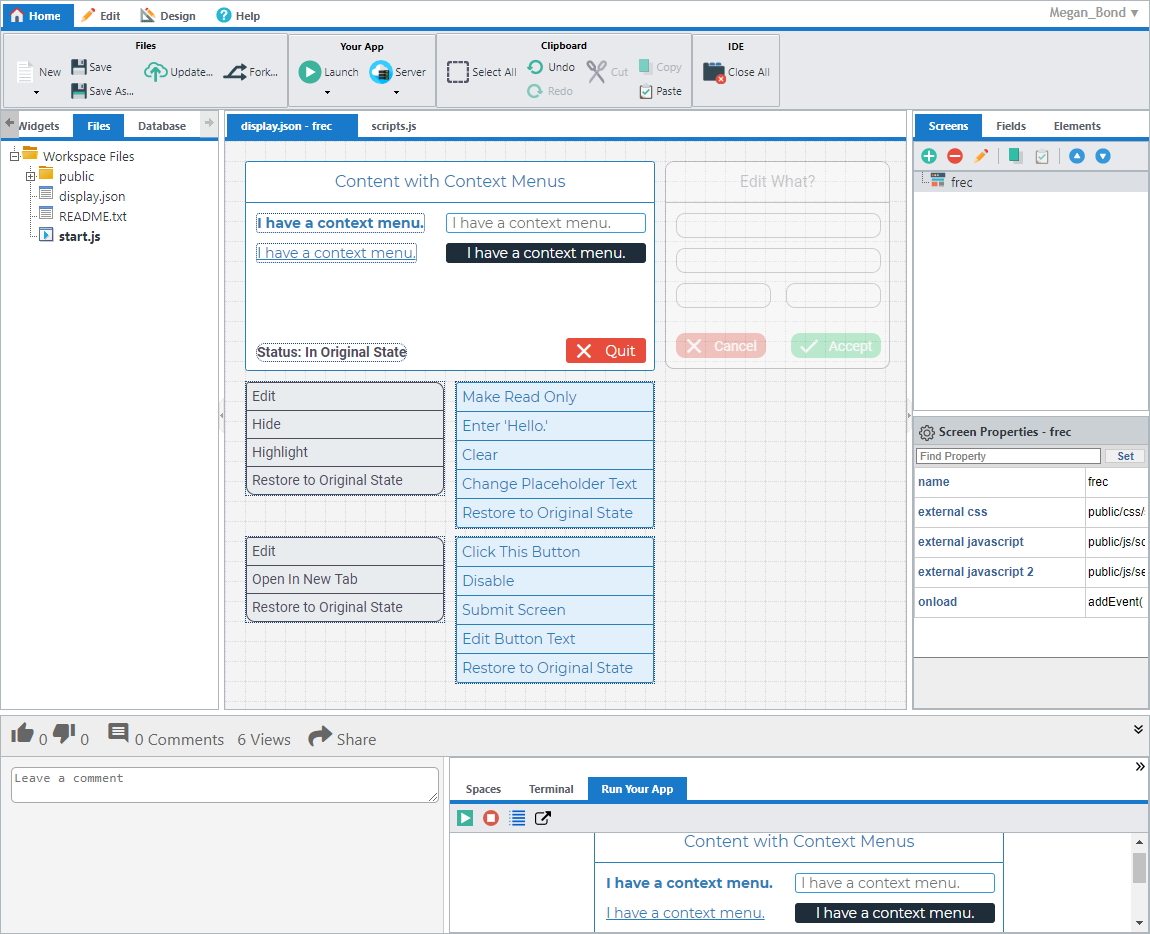
The four widgets with the text "I have a context menu." will be the ones getting the menus in this example.
Blocking the Default Context Menu
When using custom context menus, you want only your context menu to show up and not the browser’s. To prevent the bowser’s context menu from popping up, the following code is added to the onload event of the screen:
addEvent( document, "contextmenu", function(e) {
  preventEvent(); // Prevent default context menu from popping up for all elements on screen.
});
In the above code, you can see that the addEvent() and preventEvent() APIs are used to prevent the default context menu from popping up. These are Profound UI APIs. To learn more about them, please check out their documentation pages!
The parameter document being passed in the code is the HTML document's DOM Object. This is not an object you need to create. It is created by the browser when an HTML document has been loaded.
Showing and Hiding the Context Menus
Now that we have all our widgets and such on the screen, it’s time to use JavaScript to get them working! The following code is used to check if the right mouse button was clicked:
var isRightMouseButton;
if ("which" in event)  // Gecko (Firefox), WebKit (Safari/Chrome) & Opera
  isRightMouseButton = event.which == 3;
else if ("button" in event)  // IE, Opera
  isRightMouseButton = event.button == 2;
if (isRightMouseButton) { … }
This next code is used to show the corresponding menu when the element is right-clicked:
menu.style.visibility = "visible";
menu.style.left = event.clientX + 10 + "px";
menu.style.top = event.clientY + 10 + "px";
menu.style.height = "fit-content";
And the code below is used to hide the menu when an option is clicked or when the mouse leaves the menu (after having entered/hovered over it).
menu.style.visibility = "hidden";
menu.style.left = "-2000px";
menu.style.height = "0px";
Manageable and Reusable Code
This example has four widgets requiring the previous code to have their context menus work. It would be tedious adding the same code over-and-over to each element, and such a practice would also make the code harder to maintain. To make the code reusable and manageable, a function can be defined so that it can be called anywhere in its available scope. Example functions have been provided below, but please note that they are not the only answer. There are plenty more approaches, so please do share your solutions with us and the community in the comments of this workspace!
function isRightClick( menu, event ) {

  var isRightMouseButton;
  // For Gecko (Firefox), WebKit (Safari/Chrome) & Opera, was the object right-clicked?
  if ("which" in event) isRightMouseButton = event.which == 3;

  // For IE & Opera, was the object right-clicked?
  else if ("button" in event) isRightMouseButton = event.button == 2;

  // If the object was right-clicked, show the menu.
  if (isRightMouseButton) showMenu( menu, event );

  // Else, hide the menu.
  else hideMenu( menu );

}

function showMenu( menu, event ) {

  // Show the menu.
  menu.style.visibility = "visible";
  // Move the menu to the cursor’s position.
  menu.style.left = event.clientX + 10 + "px";
  menu.style.top = event.clientY + 10 + "px";

}

function hideMenu( menu ) {

  // Hide the menu.
  menu.style.visibility = "hidden";
  menu.style.left = "-2000px";

}

function onMouseLeaveMenu( menu, event ) {

  // Make sure that the mouse actually left the menu and is not just
  // over one of the options.
  // This is the original element the event handler was assigned to.
  var e = event.toElement || event.relatedTarget;

  // Check for all children levels (checking from bottom up)
  while(e && e.parentNode && e.parentNode != window) {

    if (e.parentNode == menu||  e == menu) {

      if(e.preventDefault) e.preventDefault();
      return false;

    }

    e = e.parentNode;

  }
  // The mouse left the menu, hide it.
  hideMenu( menu );

}
This code was saved to the JavaScript file scripts.js and linked to the screen using the external javascript property. If you are doing this in Profound UI Rich Display Files, you can save the file to /www/your_instance/htdocs/profoundui/userdata/custom/js to have it pulled in automatically for you.
I then add the following function calls to the widgets and their context menus:
Onmousedown event of the four widgets getting a custom context menu:

// "menuID" is replaced with the corresponding menu's id.
// "textMenu", "inputMenu", "linkMenu", and "buttonMenu".
var menu = getObj( "menuID" );
isRightClick( menu, event );
Onmouseout event of the four menus:
onMouseLeaveMenu( this, event );
// Because the object we want to affect is triggering the onmouseout event,
// ‘this’ will be referencing the menu object.
Onoptionclick of the four menus:
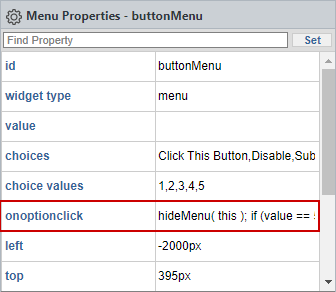
// An option was selected, hide the menu.
hideMenu( this );
Wrapping Up App
Now the menus pop up and hide as you interact with the widgets, but all of the context menus are still visible when the page loads. All that is needed to correct this is to set the left property of the menus to a large negative value, -2000px was used for this example. This will move the menus off screen and out of sight until they are brought back into view by some method.
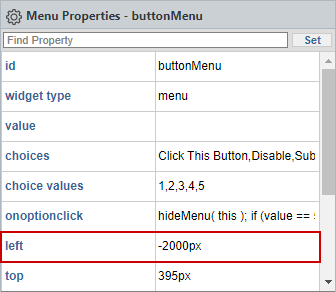
You may notice a problem here though. Now that the menus are offscreen, they are also offscreen in the designer. This is potentially a problem should you want to edit the elements but they can be easily found with the Elements tab of the Screens panel.
App In Action
You can run this on NodeRun to see it in action by clicking the Launch button and selecting Launch App in IDE or Launch App in New Tab.
...Or you can just check out this gif of it in action. :)
Cutomization and Option Actions
If you ran this example on noderun.com, you may have noticed that a lot of the menu options don’t actually do anything in this example. This is because we didn’t give them anything to do! Can you come up with the JavaScript to give the options actions? Give it a shot and share your solutions with us and the community!
Interested in testing your skills, or just showing off, but could use some more examples or documentation? You can find an example for how to make the options do things in the onoptionclick event of the menus and on our documentation site.
Remember, the provided code can be customized and moved to other widgets and other events! Your screen is what you make it! Below are some additional helpful links to further customize your popup context menu!
- Oncontextmenu Event to learn more about this event.
- addEvent() to add the
oncontextmenuevent, or any other event, to a widget. - pui.Timer() to have the menu disappear after a period of time in the events of no user interaction or the mouse leaves the menu.
- CSS Animations to animate the menu in various ways.
Challenge
Context menus can even be added to grid rows or elements. Can you make it happen, and have the menu options dynamically affect only the clicked row or element?

Thank You for Reading!
Thank you for checking out this example! Have any comments for this example or suggestions for examples you'd like to see next? Please let us know by leaving a comment in the comment section of this workspace!
Last Update: May 22nd, 2019
Updated By: megan.bond
Original Author: megan.bond
More Spaces By megan.bond (@megan_bond)

20046
0
0
20047
0
1
Be the first to comment:
Comments